Wednesday, November 24, 2010

Shards

Artists are varied in their approach to clutter on their workbench. Do you stop to tidy up so your tools are ready to hand or does the disorder somehow allow you to pull some creative inspiration out of the chaos?

One of the things that is most troublesome to me is my tendency to collect detritus and keep it in little containers all over my bench. Pieces of previous work that didn't quite make it, creative accidents, orphan beads, pieces of small repoussé work that my husband, Douglas, has made for me, interesting found objects, rocks with nifty textures, rusty bits, twigs-- all of these find a home in various receptacles. Sometimes I feel more like a 19th century naturalist, surrounded by specimens.


As I'm about to transform this space into a real working studio, I find myself firmly resolving to corral the clutter and keep my space zen-like and receptive to the slightest nudge from my Muse. But just this week, while digging through one of my boxes, I discovered a shard of polymer, a sample for the Jane Eyre cuff in faux ivory that I did some months ago.

Faux ivory cuff sample


Jane Eyre cuff

 It was too large to make into a pendant so there it sat. I just enjoyed looking at it. I like making pieces that look as though they are shards discovered in an archaeological dig and then combine them with more modern elements into one whole. The juxtaposition of ancient and contemporary creates a tension that appeals to me. I just happened to have one of Objects and Elements' open bezels in the same box-- sometimes when I buy new findings I don't want to store them away since I tend to forget about them. If I leave them out on my bench, I see them every day and eventually find a use for them. I've used these bezels with several pieces, like the Dance of the Ancients.


Dance of the Ancients

Intrepid explorer of the artistic landscape that I am, this rectangular bezel was cut, shortened and re-shaped to fit a scrap piece of polymer that I carved a bit and antiqued. So the bezel was fit to the shard, instead of the opposite!


Relic pendant

The shard was long and rectangular so would allow me to keep some of best motifs. I carefully scored the polymer with an X-acto knife and kept making shallow slices until I could break it off without damage. Some additional cutting and sanding was necessary to make it fit the bezel and then I re-stained the edges with shoe polish. My plan was to make a simple pendant necklace I could wear with jeans and a tee. Yeah, well.

The bezel had two attachment loops so I decided to look through my stash for a suitable dangle. Sitting in one of my containers was a copper leaf that Douglas had done in repoussé and I had heat-patinated to a beautiful purple/copper sheen. I drilled a hole and attached that to the bottom loop. The leaf was a more modern style than the shard but I encouraged that by stringing some garnet-colored square Czech glass beads together with mesh-covered crystal beads interspersed with lampwork rounds. I tried several ideas for the bail, like a piece of brass from a mantle clock that I had taken apart but ended up making one out of 18 gauge bronze wire. For the clasp, I used an antique etched brass bead on a chain with a handmade shepherd's crook as the loop side. It worked perfectly and was very secure.

Sonata necklace


After completing the piece, I was a bit sad that the repoussé leaf might be leaving my workbench forever-- the fate of all one-of-a-kind pieces. So I thought “why not make a mold from that great little leaf” and got out my Alley Goop RTV (room temperature vulcanizing) putty, and made a mold. I had some scrap clay in a mix of burgundy, green and purple so I used that for the leaf, which turned out to be the perfect base color and added some Jacquard metallic powders and metallic acrylic paint for the copper accents. Maybe earrings to match?

Repoussé leaf

Polymer copies of repoussé leaf

So, at the end of the day, I say – keep it but organize it. You never know what treasures you'll find to inspire you at the bottom of your personal benchtop midden.

Monday, November 15, 2010

Hoot

Sometimes here in New England the summer seems to last forever-- it gets a little cooler but the grass stays green and the leaves on our Norway maples won't drop until the weather's about ready to spread that white stuff all over the ground. Just last week most of the leaves dropped and created what I call “golden snow”.


My photographer neighbor, Lyana, wanted to do a shot of me doing a “leaf angel” in the leaves but I would have had to rake them into a pile for that and they were just too pretty laying in an amber carpet so we settled on the above shot of my front yard. We Vermonters need to soak in all the color we can, for as long as we can, since Spring can be a long way off once the leaves are gone. I dug the flea market find-- below-- out of storage and hung it on my studio door. I think it's oil crayon on canvas.


You don't have to be a Harry Potter afficianado to love owls. They have been depicted in petroglyphs since the dawn of humankind's ability to interpret our surroundings in drawings and carvings. Lately they've been showing up everywhere in my personal sphere. From the barred owl that calls from our back woods in the early evening dark to the huge Great Horned seen sitting on the wrist of Dowager Queen Eleanor of Aquitaine in the new movie version of Robin Hood, they represent the mysterious and untamed forces of nature. In some cultures they represent wisdom, in others a harbinger of death or illness.

I always associate owls with the deep woods, flying through a backdrop of towering dark hemlocks. They may be raptors like hawks and falcons and have been used by humans for hunting prey as well but they have a different vibe for me-- nothing cutesy or precious but more mystical and spiritual. Their gaze is not as intensely fierce as a hawk's. It has almost a zen quality, of just being there, waiting and listening.

So, bitten by the “owl bug”, I went in search of images that I could use to carve myself one, with the intention of making a mold so I could create several polymer clay copies for one of my cuff bracelets. While searching Etsy for inspiration, I came across several Victorian brass stampings with carving just spare and detailed enough to satisfy me so I figured why reinvent the wheel, I could use these as a jumping-off point for the cuff decorations.

I decided to lay down a textured background on my brass cuff blank so I wouldn't have to cover every inch and would get more decorative mileage out of it. I had one motif that combined the head and wings and when the clay copy ended up projecting a bit more from the flat surface, the effect was of the owl about to fly out of the background. I put two smaller owl faces at the wrists, a highly underrepresented area on most cuffs, in my opinion. I let the composition sit for a day, during which I decided it needed some woodland elements so I added some oversized acorn-y blossoms and some branches. It gave the cuff design a steampunk quality I like. Thanks to Jan for noticing that! After curing, layers of raw umber, a mix of greens and burgundy acrylics went on and were mostly wiped off. It was still missing another tone so I rubbed on tan shoe polish, which added just a bit of yellow tint and mellowed the red and green together.


Wingéd cuff


Wingéd - detail

I had some ivory base clay left over and an adjustable ring blank from Objects and Elements so I experimented with filling that with a little owl face. This is the first ring I've done and I opted for a lighter antiquing on it than on the cuff.


It's quite comfortable to wear so I'm encouraged to try another-- maybe resin? I've got some bottles of ICE resin calling to me. Next blog-- leaves. Is there a woodland theme here?

Saturday, November 13, 2010

Scarcity is the Mother of Invention

As I was waking up one morning this past week with my cuppa java I read an older blog post by my friend Barbara Lewis where she muses “Maybe scarcity challenges creativity?”.

I've always thought that the fact that I usually can't afford to indulge in a buying frenzy to acquire the latest and coolest finding/gemstone/chain/doo-dah out in the marketplace has definitely made me the “Mother of Invention”. It's made me dig a lot deeper into whatever I was working on, to find solutions that don't require a large cash expenditure.

On this blog and others, discussion has been raging lately about what entails copying vs. interpretation. When does a piece become your own and when is it merely a rearrangement of a few minor elements, not really a true embodiment of your own creativity? I don't have all the answers, by any means, but here's something that I do in my own pieces that might be useful as a jumping-off point.

Combine the techniques of different artists. I just completed a necklace using my beads and the beads of two other polymer artists (see my previous blog post, Copycats). I really loved the look of the piece and resolved to explore for myself in some new work the techniques used by my collaborators.

Rebecca Watkins, Artybecca, has a very unique carving technique which she generously shared on her Flickr site. I had bought some Dockyard micro-carvers last year which I had yet to use, which work better on small pieces than standard linoleum block carving blades. I mixed up some of my special formula ivory polymer (special only because it has the proportions of translucent, ecru and white Premo clay that I like), played with shapes, formed and cured the batch of five beads.

Getting the hang of carving can be tricky. I now have a few little nicks in my fingers, which will definitely happen if you hold your pieces in your hands while you carve. My husband got tired of hearing me yelp and made me a little jig that locks onto the edge of my desktop to keep the pieces from sliding around. But I just went slowly and not too deeply, following lines I marked on the pieces in soft pencil first. I kept it kind of primitive but kept working into them. Since the beads were not flat in any sense of the word, this took some time in order to not gouge my fingers any further. I found it very meditative.

Now the carving was done but they needed some definition and color. Claire Maunsell is a superb colorist and has inspired me ever since I first saw her work on Polymer Clay Daily. She cleverly lays down layers of pigment until she reaches her final color destination. I started with the traditional raw umber paint to define the carving, dabbing the acrylic into the cuts liberally with a paintbrush and lettting the beads sit for a few minutes before wiping most of the paint off with a paper towel. Sometimes I just cure the beads to set the paint and then sand, but these beads were curvy and uneven and wiping was my preferred method.

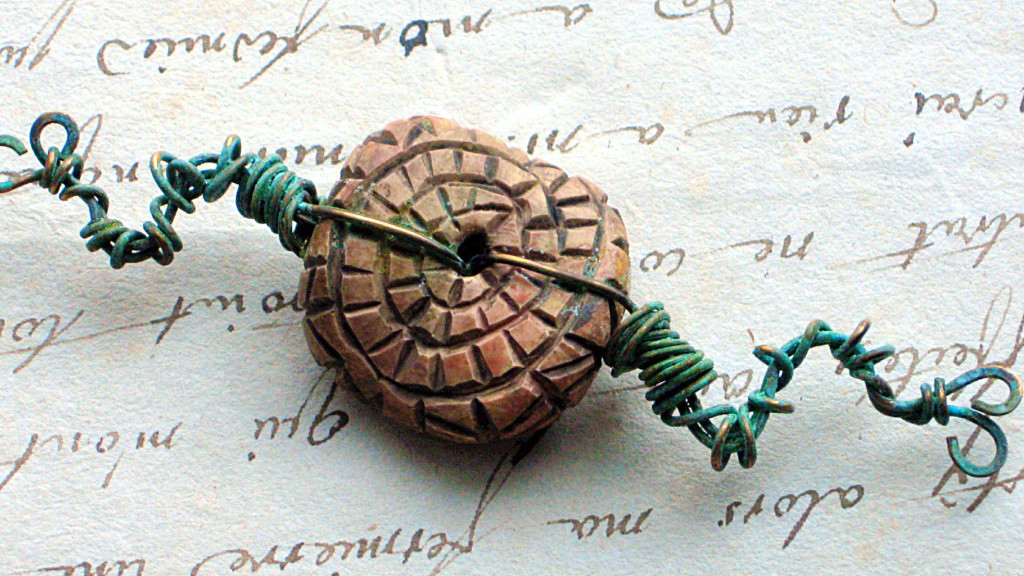
Now to add some real color! I wanted to coordinate the bead color with the patination I was going to apply on the wire-wrapped elements which would pull the whole design together. I also was using coral chips I had just purchased that were a rinsed red color. This was going to be a lighter color palette than my usual one-- more of an aurora sunrise with patina green touches. I decided to use a dry-brush technique to lay on the acrylic paint that I learned from furniture painter and master craftswoman, Ruth Pope. You use a small fan brush, one that's made from synthetic fibers and fairly stiff. Dip the tips of the brush in your your first color, then brush the excess off on a piece of paper towel. You have just a little color left and it's fairly dry. Now you can brush very gently in a back and forth wrist motion over the area you want to color. It lays down very little pigment on each pass so you can go back and add more if you want. It's almost like you're buffing the surface with the brush. Layers of color enhance one another and create a totally different effect from blending them all together into opacity, which could result in the color of mud! With this dry brush technique, what you have are layers of transparent color, one over another and the base clay color comes through in some places as well.


Patinated green chain and element from Missficklemedia.etsy.com

I'm not finished with the necklace yet but I'm very happy with what I've done so far. I also discovered that you can patinate the wirework after you've already threaded it through the polymer bead. Avoid getting too much of any patina solution on the clay or you'll have to use a commercial alcohol ink remover to take it off. For the green patina, I simply applied the patina solution I purchased from Missficklemedia with a brush in multiple applications until it was the color and coverage I wanted. Shannon LeVart has an excellent tutorial on patination, as well as supplies, for sale on the MissFickle Etsy site that I used for these pieces.

Stay tuned for more texture and antiquing experiments-- I've discovered an interesting new direction for me, courtesy of my friends Claire and Rebecca.

Monday, October 4, 2010

Copycats

I've been mulling over my thoughts for this post for a while now-- so much has been written in the past couple of months in the jewelry world about copying, infringement of ideas, theft of intellectual property, etc. As an artist who works primarily in polymer, I was feeling a bit smug as our little piece of the artistic pie has been relatively free from these sorts of public spats. The polymer world is well-known for its art retreats, dating almost from the introduction of the medium, where polymer people get together to work and freely share ideas and techniques.

But lately there's been trouble in Paradise. An officer of the International Polymer Clay Association wrote an article for the October issue of the IPCA newsletter that pretty baldly wondered what the big deal was about copying another artist's work and selling that product once the artist had shared their technique for it in a publication. Nan Roche, a pioneer in polymer and author of one of the first important books on polymer technique, made some very clear distinctions about what constitutes copying in her article published back in 1999. She talks about what is and isn't public domain: techniques are, subject matter is and combinations of colors and/or particular shapes are. But she cautions that “The problem arises when one uses a particular technique+subject matter+color/shape in the same configuration as a particular artist. It stands to reason that if you combine all the same components in the same way, it's going to look very closely like the original artists' work.” I think it's pretty much common sense that it's a no-no to sell this product, publish it or teach it. But here's another reason why it's really a bad idea to do this.

Luann Udell, in her excellent and informative blog, responds directly to the IPCA article in the organization's newsletter and references her insightful blog post, titled “What is the Story only you can tell?
She wonders about people who copy and why they would want to substitute someone else's story for their own powerful and wonderful one. As she says “...in YOU, is a story that only YOU can tell.
Because it is YOUR story. It happened to YOU. And it changed you--how you look at life, how you look at yourself, where you fit into the world.”

I interpret this to mean, when you copy, you basically rip yourself off, even worse than you've ripped off the artist that you've stolen from. Your piece has no "authentic voice", it's just a manipulation of objects or colors, it has nothing of you in it.

Personally, I find it impossible to copy anyone's work exactly. I always have to do my own thing. I love to look at other people's work, I find it a very rich source of ideas but I never want to copy it. The first thing I think is “oh, that's a good idea” and my very next thought is of what I can do with it to make it my own. Usually the idea inspires something completely new, not derivative in any sense. It just jogs my own imagination and creativity. Just as the natural world does this for me, inspiring me to try colors and textures in my work. I've seen some blog posts lately in which people claim that they keep their art “pure” by not looking at others' published work in popular magazines. That's just limiting and you're deluding yourself if you think that you're not noticing what's out there around you.

So I've been wondering to myself, what is the antidote to all this angst in art? What positive statement can I make to address this worry about what's mine vs what's yours? So I decided to recruit my old friend, Collaboration! In my Flickr surfing lately I've discovered two polymer artists whose work I really admire and adore and so I asked the two of them if they would like to collaborate on some pieces together and they cheerfully agreed. This first piece was designed around the folk-arty and sculptural cat focal of Rebecca Watkins  (ArtyBecca) for my annual Hallowe'en necklace, joined by the quirky and stylish beads of Claire Maunsell (StillPointWorks). Both these ladies have techniques that I thought would complement my own aesthetic, while at the same time, would inspire some beads by me that would meld their styles into something entirely new.


KatManDo necklace collaboration

It's titled after Rebecca's name for her cat/man focal bead. The long textured beads in black, white and gray are by Claire, and I also used some of Rebecca's gold textured beads with integral metal loops and a long ivory one in the design. After adding three chunky, textured and highly antiqued beads I newly made to coordinate with my collaborators' pieces, I ransacked my older beads for some with red accents and made some wire-wrapped and beaded sticks to add color and texture. After watching a tutorial by Maggie Maggio on making polymer links for a necklace that I found on Cynthia Tinapple's blog, Polymer Clay Daily, I experimented with making my own interpretation and created textured black antiqued links for the focal's bail.

"Ritual" -  earrings

With the clay left over from my beads I made these, adding Dalmation jasper to the copper dangles and finished them with handmade copper earwires and coils. My collaboration buddies have spurred both my interest in and experimentation with texture and antiquing and I've been just knocking the work out so expect to see more in the next few blogs.

So I think we can all play together nicely if we just respect each other's stories and celebrate our own. Simple, isn't it?

Wednesday, September 22, 2010

Patina

I sometimes refer to myself as the “Queen of Rust”. Maybe because I am a redhead and I am myself speckled with those little rusty dots called freckles, I love the reddish-brown color of oxidized metal, patinated and given character by seasons outdoors and the vagaries of weather.

My husband has brought me many treasures he has unearthed (well, run over with our large field mower!) in the fields of our old New England farm-- large metal hoops that hold spoked wheels together from old farm wagons, bits and pieces of old buggies, rust-pocked, holey old buckets, gears, etc. A friend of mine displays her finds in an artful collage on the white-washed interior wall of her old 3-storey barn. Mine adorn my woodland garden, brimful of ferns we transplanted from our woods, as well as astilbe, jack-in-the-pulpit, and trout lilies that hitchhiked along with the ferns. I stand the hoops upright, propped with river stones, where they make excellent garden sculptures.


I've lately been cleaning off and fixing up--in an Adirondack theme--the little screened porch attached to the end of our workshop, displaying stored treasures I've collected for years. I went on a barkcloth binge a few years ago and in a way, I'm glad I did as the stuff is hard to find in the older, silk-screened beautiful rough textures that I collected. On one of his mowing forays, Douglas crunched into a tangle of old wire and brought it back to show me-- it laid for years in a rusty pile next to the driveway. As I was cleaning up one weekend, I happened upon it and it struck me as how sculptural it was, just all randomly tangle-y and patinated by years of weathering. Now it will have a new home adorning the pasture outside my porch, suspended in a custom hanger made by my artisan blacksmith husband. Repurposing at its very organic best!


I have now met my opposite number in the love of all things rusty-- Ted. My friend, neighbor and super-photographer, Lyana and I were out-and-about looking for antiques one weekend not long ago and here was a sign “Barn Sale” that tweaked my interest-- my best finds have been made, not at pricey flea markets or antique malls, but in the downhome environs of old barns and sheds, the messier and less-organized the better. A quick u-turn later and we were met by Ted, a prop-master, uber-collector and hoarder extraordinaire, whose orangey stash was unmatched in my experience in both scope and quality. I will wax rhapsodic at length on his other good stuff in some later post (and boy is there a lot of stuff!)


As I was already in rust-mode I thought I would play a bit with patinas. I dug out some vintage findings I got from Jems Gems on Etsy and applied some green patina solution I've had hanging around for years. This stuff goes on in light layers and some time has to pass before you really see the results. Leaving everything overnight worked the best. I also tried another little technique over the patina, which I promise to reveal once I've worked it into something that produces consistent results. Adding to all this fabulous color in these photos are some chain and findings I got from the talented Shannon LeVart who is also an editor on the Art Bead Scene blog. She's just produced an e-book called Color Drenched Metals, and I've purchased a copy from her Etsy shop as well as several bottles of her excellent patina solutions. I've got gobs of vintage chain and I can't wait to see what I can do armed with her well-explained technique and my penchant for experimentation.


Friday, July 9, 2010

ArtBliss

I really can't say enough about Cindy Wimmer and Jeanette Blix. They are talented, ambitious, courageous, artistically gifted and all-round great friends and wonderful women. Their designs have appeared in just about every jewelry publication that you can find on the newsstands.

Cindy has just had four pieces of work published in the latest Easy Wire 2010 and the piece she shows on her blog post of June 30 for the Art Bead Scene Design Team Challenge is creatively lovely and so well-photographed that you would think it was professionally done.

Jeanette is also a  talented jewelry designer who has published several Glass Art calendars, teaches wireworking and is the owner of Fundametals, an online shop that carries anything you could possibly want for wireworking and jewelrymaking, including some very interesting beads and enamel. She's always looking for the newest and best and her prices and customer service are fantastic.

Together this Dynamic Duo have come up with an amazing event here on the East Coast in Northern Virginia, debuting this September 24-26, called ArtBliss with some very well-known artists teaching day and evening classes in jewelry and mixed media. See the sidebar and click on the announcement for all the information you need. I'm going down to DC from Vermont on Amtrak for the event and I can't wait to meet in person some of the people who have supported me with their ideas, collaborations and mentoring since I began blogging and putting my work out in the world.


The tagline of the event is “All dreams come true if you have the courage to pursue them” something that I have definitely found applies to my life and creative work. Consider taking a class or two-- I'd love to meet more of you in person, my dear online friends!


Thursday, July 8, 2010

Milestones

Milestones are markers, like the stones that the Romans set up to guide travelers along their system of paved roads. That's the operative word here-- “guiding”- to show a pathway rather than mark a destination or goal, a meaning used more frequently in these 21st century times.

I believe that a milestone guides you in a direction as well as to a specific place. It's not a time to sit down and relax, to dwell on your achievements but rather to mark a passage and chart a direction for the future.

My goals when I first started this blog, this electronic journal (or journey) were to inspire, encourage and inform my readers in their creative endeavors. Obviously a pathway to doing that was to have my work, techniques and ideas published in print and online so as to reach more people. My first online contacts were with other art beadmakers and jewelry artists and I naturally hoped some day to get my work in the publications that inspired me the most. My Apocalypto Beads showed up in The Best of Stringing Magazine in a collaboration with Lorelei Eurto and this past spring I got my very own page in Stringing for my necklace tutorial “Reading the Stones”.

This past January I was contacted by the editor of Belle Armoire Jewelry, Christen Oliverez, on a referral from my good friend and fellow artist Deryn Mentock. I couldn't have been more thrilled or surprised, since BAJ was one of several magazines that I absolutely adored and admired for the quality of their articles and presentation.

So now I can announce that my very first tutorial has been published in BAJ in the Summer 2010 issue, called “Pas de Deux”. I am pleased as punch to be included with some friends (Barbara Lewis and Deryn Mentock) as well as other artists that I greatly respect for their work. But I won't be resting on my laurels, since I am full of creative energy and new ideas – for me the recognition is like a super wonderful tonic! I'm planning a book and hoping to teach my first classes this fall and possibly I'll have a booth at a major bead show next year-- who knows?

As I journey forward, I'm also looking back at pieces I've already completed. Some of these are going in my Etsy store to find new homes, some are being re-worked as my skills increase and my design sense matures in this wonderful medium of polymer clay.

Tundra beads - new in my Etsy shop


Tomb Relic pendant - new in my Etsy shop

Dance of the Ancestors - new in my Etsy shop


Dance of the Ancestors - detail


Dance of the Ancestors - detail of reverse side

Machu Picchu beads - new in my Etsy shop


Machu Picchu cuff - new in my Etsy shop

Delphi necklace - new in my Etsy shop

Delphi necklace - detail

Delphi necklace - detail